How to Make the Iconic Matilda Cake:A Chocolate Lover’s Dream
Introduction
Remember that iconic scene in the 1996 film “Matilda” where Bruce Bogtrotter devours an entire chocolate cake as punishment from the terrifying Miss Trunchbull? That decadent, moist chocolate creation has since inspired dessert lovers worldwide to recreate what is now affectionately known as the “Matilda Cake.” This rich, fudgy chocolate cake has become a legendary treat for birthdays, celebrations, or simply when chocolate cravings strike. The movie moment perfectly captures both the intimidating size of the cake and its irresistible appeal—so delicious that even after being force-fed, Bruce couldn’t help but finish every last crumb! Today, we’re sharing how to create this show-stopping dessert that has remained in our collective sweet tooth imagination for decades.
Table of Contents
What is Matilda Cake?
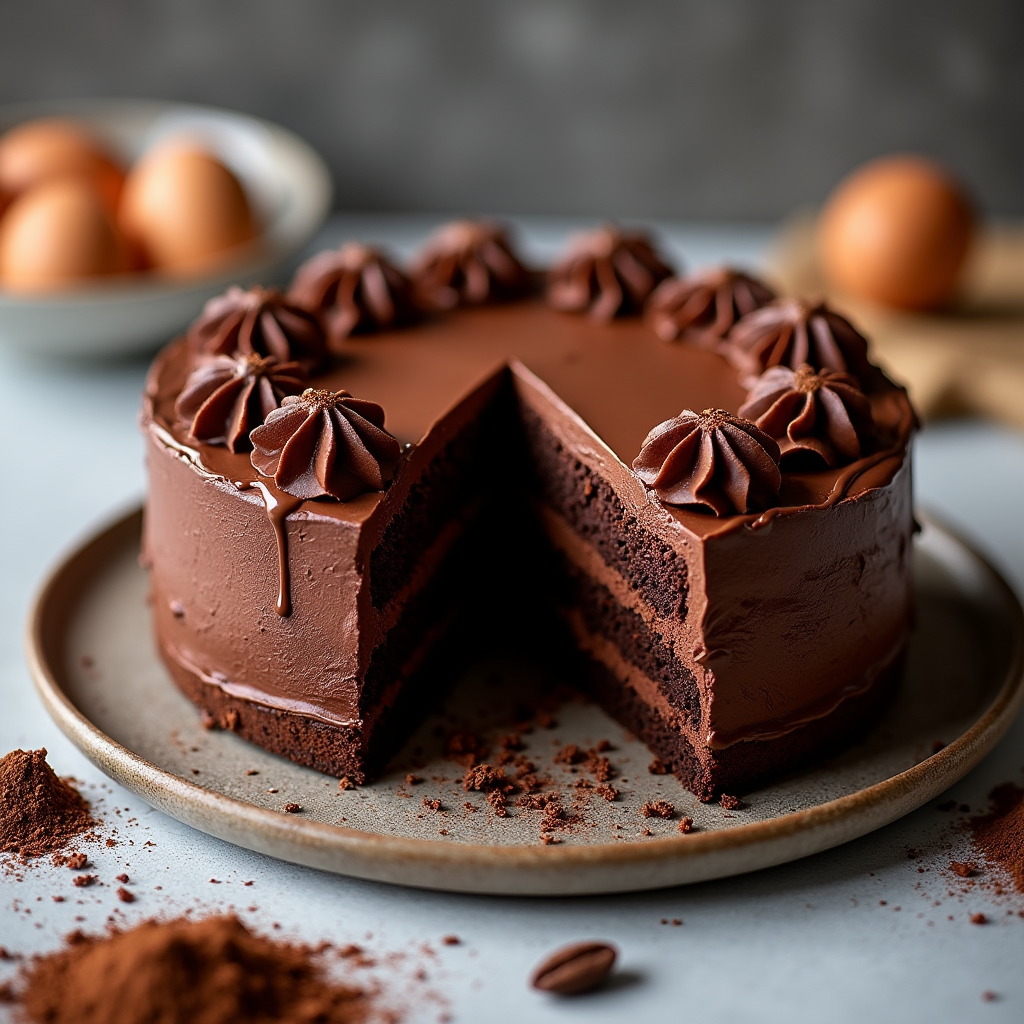
The Matilda Cake is far more than just another chocolate cake recipe—it’s a cultural phenomenon born from one of children’s cinema’s most memorable food scenes. This double-layer chocolate masterpiece features an extraordinarily moist, dense chocolate cake base complemented by a silky, rich chocolate ganache frosting. Unlike standard chocolate cakes, the Matilda Cake distinguishes itself through its intensely chocolatey profile and fudgy interior that somehow remains light enough to enjoy more than just a sliver.
The cake consists of two generous chocolate layers sandwiched together with chocolate frosting, then entirely enrobed in more of that luscious frosting. What makes it truly special is the balance between sweetness and deep chocolate notes—achieving that perfect chocolate intensity that made Bruce Bogtrotter unable to stop eating despite the circumstances.
In popular culture, this cake represents both indulgence and rebellion—the delicious dessert that became a symbol of triumph when Bruce finished it against Miss Trunchbull’s expectations. Since the film’s release, chocolate enthusiasts have attempted countless variations, but the core elements remain consistent: extreme chocolate flavor, incredible moisture, and an appearance substantial enough to intimidate even the most dedicated dessert lovers.
Ingredients for Matilda Cake
Creating an authentic Matilda Cake requires high-quality ingredients that contribute to its signature richness and depth of flavor. Here’s everything you’ll need:
For the cake layers:
- 2 cups all-purpose flour
- 2 cups granulated sugar
- ¾ cup high-quality unsweetened cocoa powder (Dutch-processed preferred for deeper color)
- 2 teaspoons baking soda
- 1 teaspoon baking powder
- 1 teaspoon salt
- 2 large eggs, room temperature
- 1 cup buttermilk
- ½ cup vegetable oil
- 2 teaspoons pure vanilla extract
- 1 cup hot, strong brewed coffee (enhances chocolate flavor without adding coffee taste)
For the chocolate frosting:
- 1 cup unsalted butter, softened
- 1½ cups unsweetened cocoa powder
- 5 cups powdered sugar
- ⅔ cup heavy cream
- 2 teaspoons vanilla extract
- ½ teaspoon salt
The key to achieving the Matilda Cake’s famous texture lies in using fresh, room-temperature ingredients and high-quality cocoa powder. For an even more indulgent version, consider folding in ½ cup of semi-sweet chocolate chips into the batter or adding a thin layer of chocolate ganache between the cake layers. The hot coffee in the recipe doesn’t impart coffee flavor but rather enhances and deepens the chocolate notes while contributing to the cake’s exceptional moisture.
How to Make Matilda Cake
Creating this iconic chocolate masterpiece requires attention to detail but is actually simpler than it appears. Follow these steps for chocolate perfection:
Step 1: Preparing the Cake Batter
- Preheat your oven to 350°F (175°C). Grease and line two 9-inch round cake pans with parchment paper.
- In a large mixing bowl, whisk together the flour, sugar, cocoa powder, baking soda, baking powder, and salt until well combined.
- In a separate bowl, beat the eggs, then add buttermilk, vegetable oil, and vanilla extract. Mix until smooth.
- Gradually incorporate the wet ingredients into the dry ingredients, mixing on medium speed until just combined.
- Slowly pour in the hot coffee while mixing on low speed. Don’t worry if the batter seems thin—this is exactly how it should be for a moist cake.
Step 2: Baking the Cake
- Divide the batter evenly between the prepared cake pans.
- Bake for 30-35 minutes, or until a toothpick inserted into the center comes out clean or with a few moist crumbs.
- Check for doneness around the 25-minute mark—the cake should spring back slightly when touched.
- Allow the cakes to cool in their pans for 10 minutes, then transfer to wire racks to cool completely before frosting.
Step 3: Preparing the Chocolate Frosting
- In a large bowl, beat the softened butter until creamy and smooth.
- Gradually add cocoa powder and mix until combined.
- Alternate adding powdered sugar and heavy cream, mixing well after each addition.
- Add vanilla extract and salt, then beat on medium-high speed for 2-3 minutes until fluffy.
- If the frosting seems too thick, add more cream one tablespoon at a time. If too thin, add more powdered sugar.
Step 4: Assembling the Cake
- Once the cake layers have completely cooled, place one layer on a cake stand or serving plate.
- Spread approximately 1 cup of frosting evenly over the first layer.
- Carefully place the second cake layer on top.
- Apply a thin layer of frosting around the entire cake as a “crumb coat,” then refrigerate for 15-20 minutes.
- After chilling, generously apply the remaining frosting to the top and sides of the cake, creating the impressive, smooth finish seen in the movie.
- For authentic Matilda Cake presentation, keep the decoration simple—the cake’s imposing size and rich chocolate appearance should speak for itself.
Tips for Making the Best Matilda Cake
Achieving Bruce Bogtrotter-worthy results requires attention to a few key details:
Room temperature ingredients are crucial, particularly eggs and buttermilk. This ensures proper emulsification and a uniform cake texture.
When measuring flour and cocoa powder, spoon them into measuring cups rather than scooping directly from containers. This prevents compacting and using too much dry ingredient, which would result in a dry cake.
Do not overmix the batter once the flour is added. Overmixing develops gluten, leading to a tough, less tender cake.
For the perfect frosting consistency, ensure your butter is properly softened but not melted. If your kitchen is warm, you may need to chill the frosting briefly if it becomes too soft to work with.
To achieve professional-looking frosting, invest in an offset spatula and bench scraper for smooth sides. Running the metal tools under hot water, then drying before smoothing the frosting, creates a nearly flawless finish.
Serve the cake at room temperature for optimal flavor and texture—cold cake straight from the refrigerator won’t have the same melt-in-your-mouth quality that made the original so irresistible.
Why You Should Try Matilda Cake
The Matilda Cake isn’t just a dessert—it’s an experience that brings together nostalgia, indulgence, and pure chocolate bliss. This show-stopping creation is perfect for making any occasion memorable, whether it’s a birthday celebration, movie night with friends, or simply a weekend treat for chocolate lovers.
What makes this cake special is its versatility despite its distinctive identity. You can adapt it seasonally—adding peppermint extract during holidays, orange zest for a citrus twist in summer, or even a layer of raspberry preserves between the cake layers for a fruit-chocolate combination. For coffee enthusiasts, emphasizing the coffee notes by adding espresso powder to both the cake and frosting creates a mocha variation.
Beyond its delicious taste, preparing this cake creates moments of connection. Invite children to help in the kitchen while sharing the story of Matilda and Bruce Bogtrotter—making it both a culinary and cultural experience. The cake has developed such a following that serving it becomes an instant conversation starter, with guests often recognizing its famous inspiration.
Unlike delicate, temperamental desserts, the Matilda Cake is impressively forgiving for bakers of all skill levels while still delivering professional-quality results that appear far more difficult than they actually are.
Conclusion
The legendary Matilda Cake represents everything we love about dessert—it’s decadent, memorable, and brings joy with every forkful. By following our recipe and tips, you can recreate this iconic chocolate masterpiece that captivated movie audiences decades ago and continues to delight chocolate enthusiasts today.
What makes this cake truly special isn’t just its rich flavor and impressive appearance, but the story behind it—a reminder that something as simple as chocolate cake can become legendary when wrapped in a memorable moment of childhood cinema. Whether you’re a devoted fan of the movie or simply appreciate an exceptional chocolate cake, this recipe delivers satisfaction with every bite.
Ready to bake your Matilda Cake? Gather your ingredients, cue up the movie for inspiration, and prepare to create a chocolate sensation that would make even Miss Trunchbull reluctantly impressed! Don’t forget to share your baking adventures in the comments below, and explore our other cake recipes for more delicious inspiration.
Matilda Cake FAQ
Can I make Matilda cake in advance?
Absolutely! The Matilda Cake actually benefits from being made a day ahead, as this allows the flavors to develop more fully. You can bake the cake layers up to two days before assembling, storing them tightly wrapped at room temperature. The frosting can be made a day ahead and refrigerated in an airtight container—just bring it to room temperature and re-whip before using. Once assembled and frosted, the complete cake will keep well at room temperature (covered) for up to 3 days, or refrigerated for up to a week.
Can I use different frosting for Matilda cake?
While the classic chocolate frosting is traditional for an authentic Matilda Cake experience, you can certainly experiment with variations. A chocolate ganache creates an even more decadent version, while chocolate cream cheese frosting adds a tangy dimension that balances the sweetness. If you want to maintain the chocolate theme but add contrast, consider a chocolate buttercream for the filling and a whipped chocolate ganache for the exterior. However, to stay true to the movie’s iconic dessert, any frosting should maintain that rich, dark chocolate appearance.
How do I store Matilda cake?
For short-term storage (2-3 days), keep your Matilda Cake at room temperature under a cake dome or loosely covered with plastic wrap. For longer storage, refrigerate the cake in an airtight container or covered with plastic wrap for up to 7 days. Always bring refrigerated cake to room temperature (about 1-2 hours on the counter) before serving for the best flavor and texture. Individual slices can also be frozen for up to 3 months—wrap them tightly in plastic wrap and then aluminum foil, and thaw overnight in the refrigerator before bringing to room temperature.
Can I make this cake gluten-free?
Yes, the Matilda Cake can be successfully made gluten-free by substituting the all-purpose flour with a high-quality gluten-free 1:1 baking flour blend that contains xanthan gum. Many bakers report excellent results using brands specifically formulated for cake baking. You may need to increase the baking time by 3-5 minutes, as gluten-free batters often take slightly longer to set. All other ingredients in the recipe are naturally gluten-free, but always check packaging on products like cocoa powder and vanilla extract to ensure they haven’t been processed with gluten-containing ingredients.
👉 Looking for more delicious and healthy recipes? Check out our complete collection here or try this amazing breakfast idea: Daniel Fast Breakfast.
everything you need to elevate your baking game. Ready to bake? Let’s get started now!